Est. Read Time: 11 mins
In music, transcription refers to the process of notating existing songs or sounds through the careful analysis and accurate representation of their fundamental musical elements.
In simpler terms, transcription is listening to musical sounds and writing down what you hear. Although sometimes used interchangeably with the term arrangement, a transcription is a more faithful adaptation of the original piece whereas arrangements tend to significantly alter various aspects of the music.
Transcription’s most obvious use is to create a playable score for fellow musicians. When the sheet music for a particular piece of music is non-existent or very difficult to obtain, transcription may be the only feasible option to get the notes for a song. How accurate those notes are will heavily depend on the listening and notation skills of the transcriber. A solid understanding of melody, harmony, rhythm, and timbre, along with a great sense of pitch are all necessary to transcribe music well.
This all leads to a very important question…
How Do I Improve My Listening Skills So I Can Transcribe Music Well?
Ear Training.
Essentially, ear training involves learning to identify pitches, intervals, melody, harmony, rhythm, and other basic musical elements. Although there are numerous ear training exercises, one of the best ways to improve your aural skills is by…transcribing music.
That’s right. The skills you need to transcribe music well can be developed by transcribing music. With that in mind, let’s take a look at some of the steps involved in the process.
Note: This guide assumes that you have a basic knowledge of music theory and/or MIDI sequencing. If you have no prior experience with this subject matter, you may want to reference additional articles before continuing so that you can better understand the content.
Step 1 - Start Simple
“Don’t Bite Off More Than You Can Chew”
You wouldn’t attempt to participate in a triathlon 2 hours after learning how to swim or ride a bike. Well ok, for those of you who would, I wish you the best of luck but I doubt you would get very far. Similarly, if you attempt to transcribe a piece that is too complex (relative to your current aural skill level) you’ll probably either end up with a mediocre transcription, or no transcription at all.
If you are a beginner, I would suggest starting with transcriptions of songs with simple melodies and only a few instruments. As you become more comfortable with transcription, you should try your hand at more involved music.
For the rest of this article, I will be referencing a transcription I did of the piece, “Pilot for Hire”, by Stan LePard. The flight sim fans out there should recognize this as the iconic “FSX01” from Microsoft’s Flight Simulator X. Since Microsoft has released another iteration of its flight simulator in 2020, I figured I would pay homage to the soundtrack of one of my favorite simulators by recreating the track. This piece also lends itself well to a more detailed breakdown of transcription, though it may be a bit complicated for the newly initiated. However, if this is you, fear not because it should also improve your understanding of the information laid out in this article.
Step 2 - Listen to the Music
Let me rephrase…
ACTIVELY LISTEN to the music that you will attempt to transcribe.
This should really go without saying but I cannot stress the “actively" part enough. You cannot transcribe music well if you only listen casually. You must distinguish between various instruments and accurately discern what each one is playing. When attempting to transcribe a piece, you can try to do it during a live performance but having a high-quality recording will result in a less stressful time trying to pick out the correct notes. This will not only allow you to listen as often as you’d like but should also allow you to listen where you like which is ideally in a quiet area, free from distractions.
Another perk of using recorded music is the ability to alter the audio to make it even easier to identify the details of a song. Later we will discuss some of these tips and tricks but for now, listen to the original recording of “Pilot for Hire” below, then, continue reading to learn how you can transcribe a piece like this.
Step 3 - Gather Your Tools
As with any type of work, having the right tools can make your job much easier. Now, the EASIEST way to get a piece of music transcribed accurately is to ask a professional to do it and you can request such services here.
Assuming you still want to attempt transcribing music yourself, especially for ear training purposes, the first thing you will need is either manuscript paper (if transcribing by hand), or a computer with notation and/or audio sequencing software.
Musescore is a great piece of free software you can use to digitally notate music and while I highly recommend using it, I also think you should have a digital audio workstation (DAW) that you can use to make more realistic “mockups” of your transcription. I used Steinberg’s Cubase DAW to create the transcription of “Pilot for Hire” but some free DAW alternatives currently include Bandlab’s Cakewalk for Windows and Apple’s GarageBand for macOS. Cockos’ Reaper is an excellent, multi-platform DAW with a non-intrusive free trial option, although, for the asking price, I would suggest supporting them and buying it outright. Finally, if you’re pressed for storage space on your computer, Bandlab is a strong, online option.
After settling on your DAW of choice, source a clear, high-quality audio recording of the original song. You can either import a WAV or MP3 file into your DAW to allow for maximum manipulation of the audio or play the song in a browser on a site like YouTube.
Finally, unless you have perfect pitch (and maybe even if you do), you’ll want an acoustic instrument or MIDI input device to play what you think you’re hearing. You can then compare what you play to the recording and assess your level of accuracy. This isn’t absolutely necessary, but will immensely aid your transcription efforts. Considering this, I recommend using an acoustic piano or MIDI keyboard while transcribing to make the job that much easier.
Pro Tip: You will ideally have a way to adjust the speed of the audio recording while transcribing. Being able to slow down what you hear can make a huge difference, especially when dealing with fast passages. You also can benefit from using some form of equalization (EQ) while transcribing as it can help isolate certain frequencies that may otherwise be difficult to hear in a full mix. Picking out the high notes of a flute or glockenspiel in an orchestral setting might be tough and is a great example of how EQ can help transcription.
If using a DAW, these two things should be relatively easy to do. However, if you’re listening on YouTube, you should install an EQ extension for Google Chrome and use it in conjunction with YouTube’s video playback rate as your alternative tool.
Step 4 - Time and Tempo
After actively listening to the piece a few times, start to work out the time signature and tempo characteristics. Is the piece in 3/4 or 4/4 time? Is it in 5/8? Does it change time signatures? Does it change tempo? If so, how?
These are all questions you have to ask yourself early in the transcription process to avoid having to redo work later on. If you are notating the music by hand or digitally, count the beats per measure at the beginning of the music and add the time signature. Also, be aware of how fast the music is playing and add a suitable tempo marking. As the song progresses, keep track of any changes to time or tempo and include the relevant markings if necessary.
If you are sequencing in a DAW, you must also follow these same guidelines but instead of textual markings, you’re going to use time and tempo tracks to tell the software how to “count” the music.
From my analysis, “Pilot for Hire” begins at about 82 beats per minute (bpm) before increasing to approximately 122 bpm which it maintains for the remainder of the piece. The time signature (depending on how you notate the slight pause before the significant tempo change) is 4/4 for the duration of the piece.
Step 5 - Melody and Harmony
Assuming you have a decent sense of rhythm, figuring out the notes of a song’s main melody, as well as its supporting harmony, will probably be the most difficult and time-consuming part of any transcription. I would suggest starting with either the most prominent melodic line or the strongest supporting harmony line (usually the bass), then work from there.
Listen, hum, and play the line as much as necessary until you are confident that you fully understand everything that is happening melodically, rhythmically and dynamically. You can try to transcribe one instrument part from beginning to end or jump between parts, filling things in section by section. Sometimes you may even want to try a combination of both. There’s no singular way to transcribe music so do whatever is most natural for you. However, regardless of the method you choose, be sure to always pay close attention to the details.
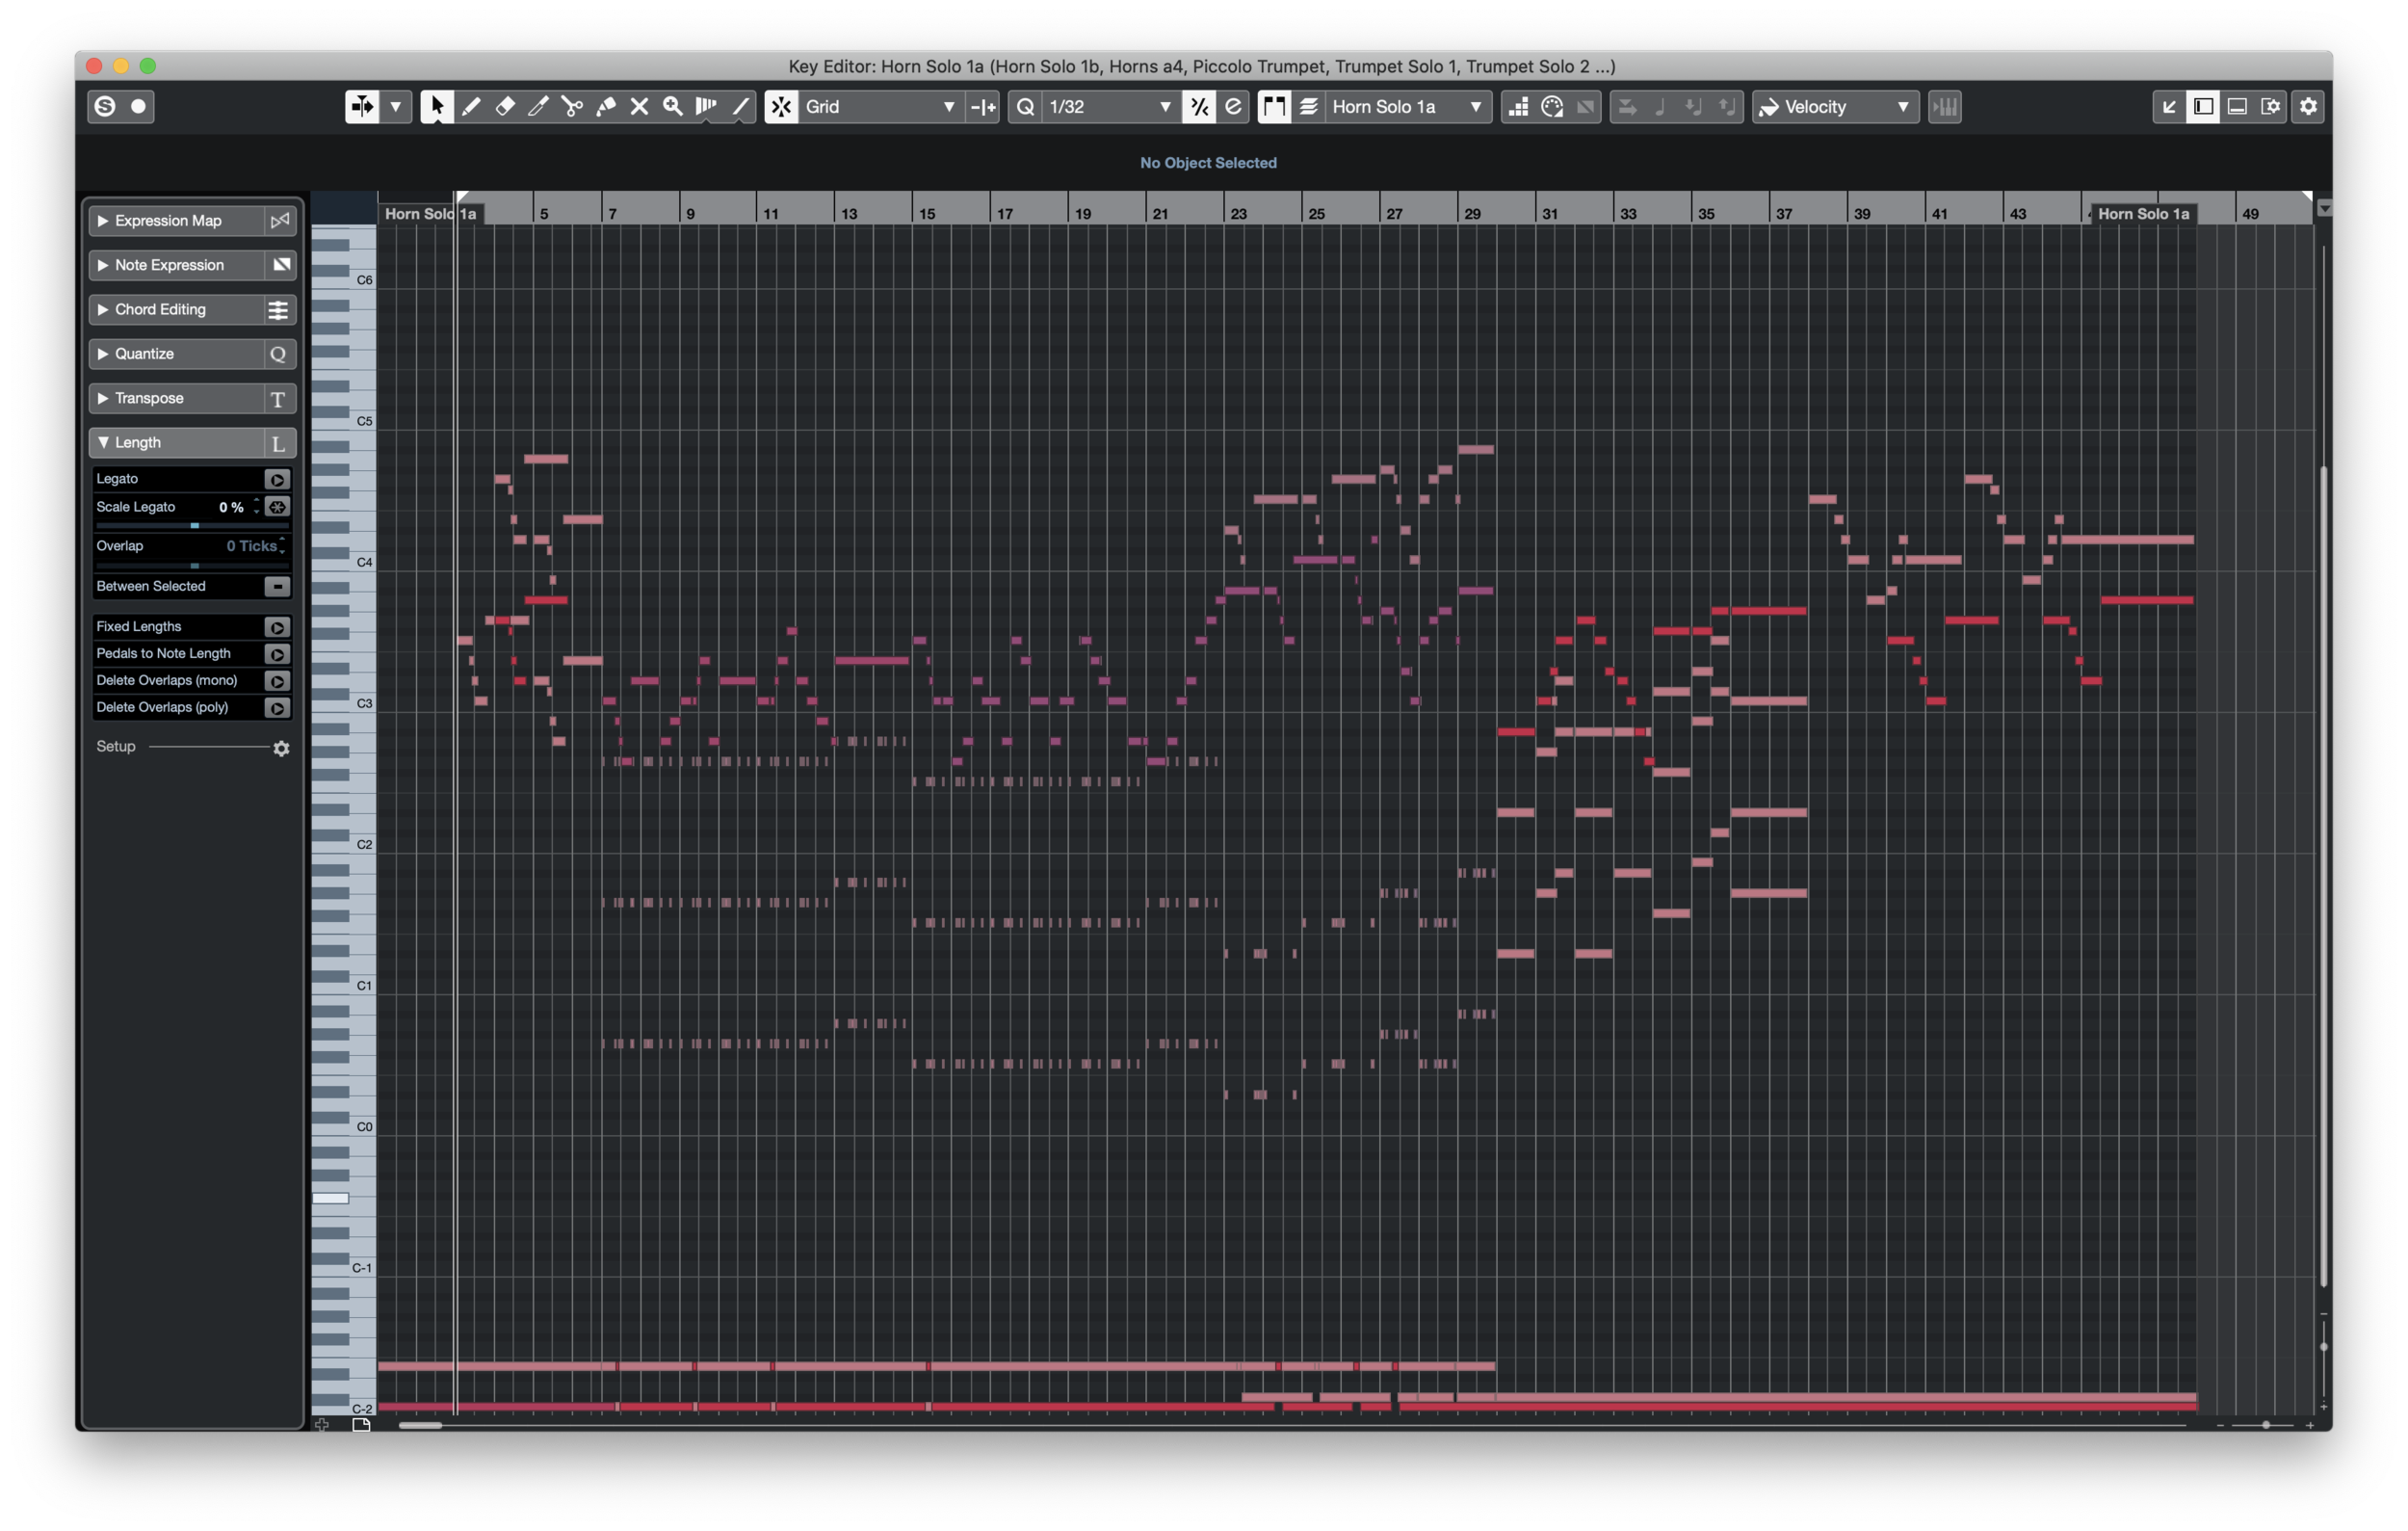
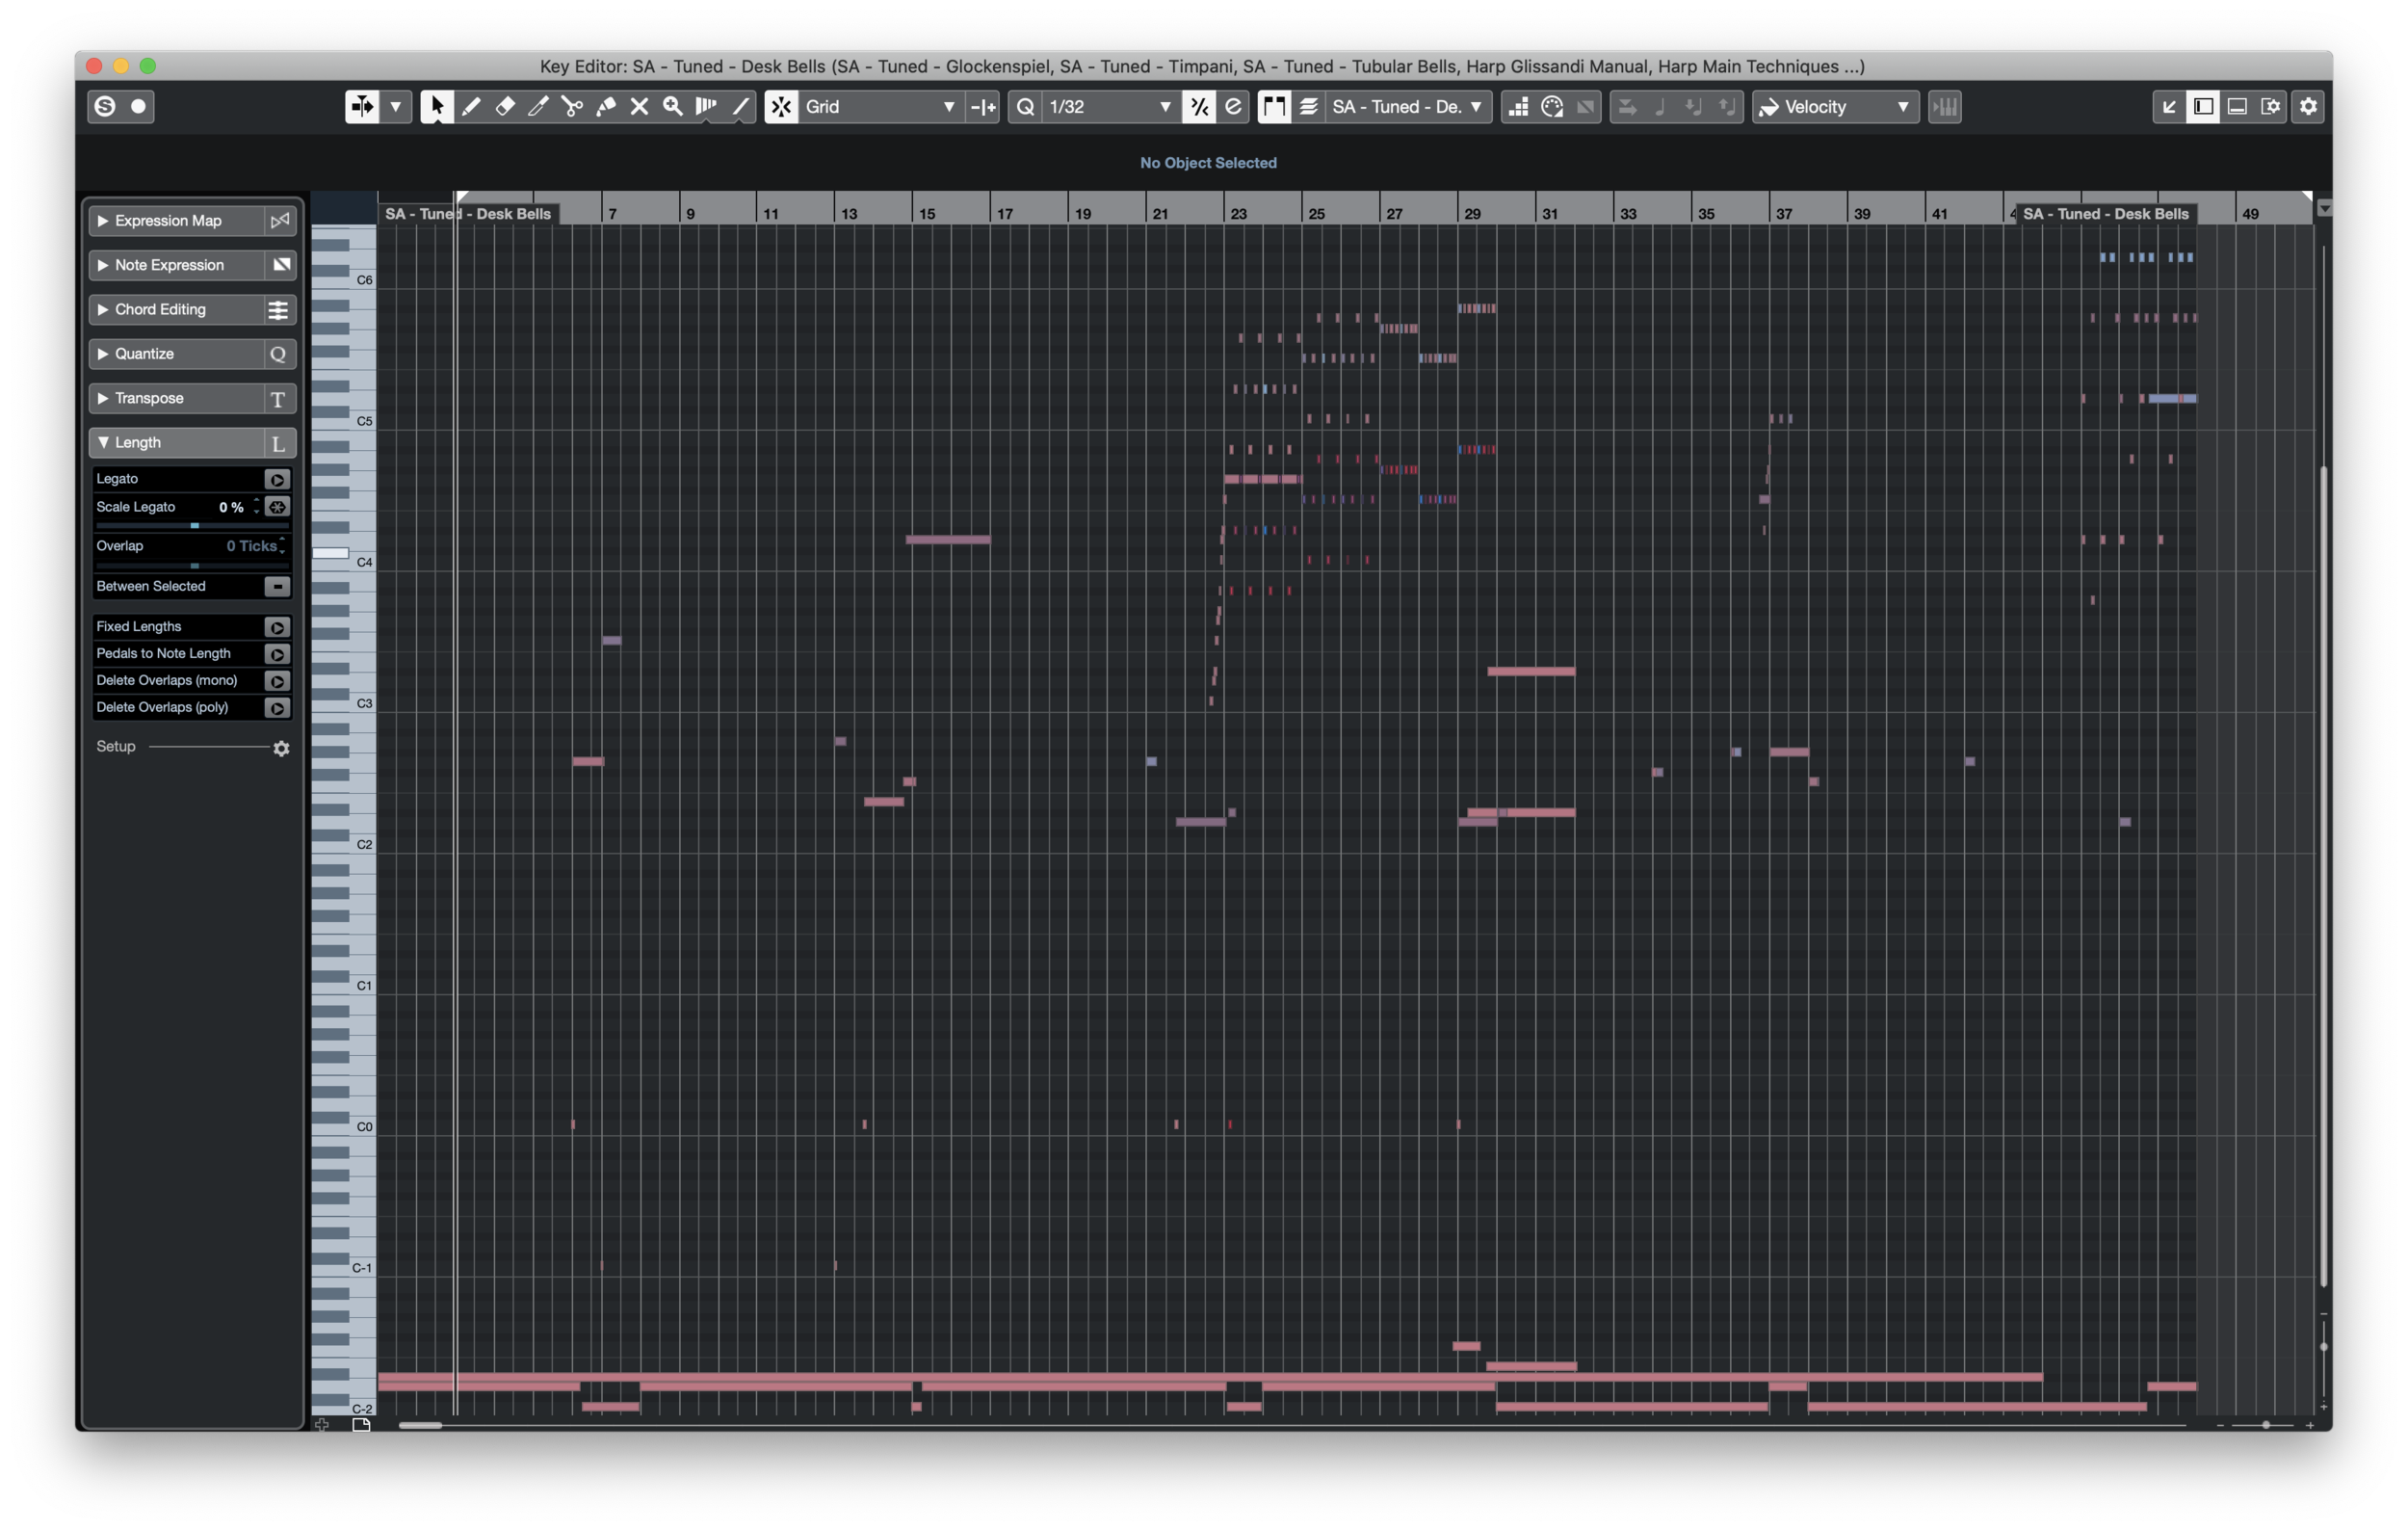
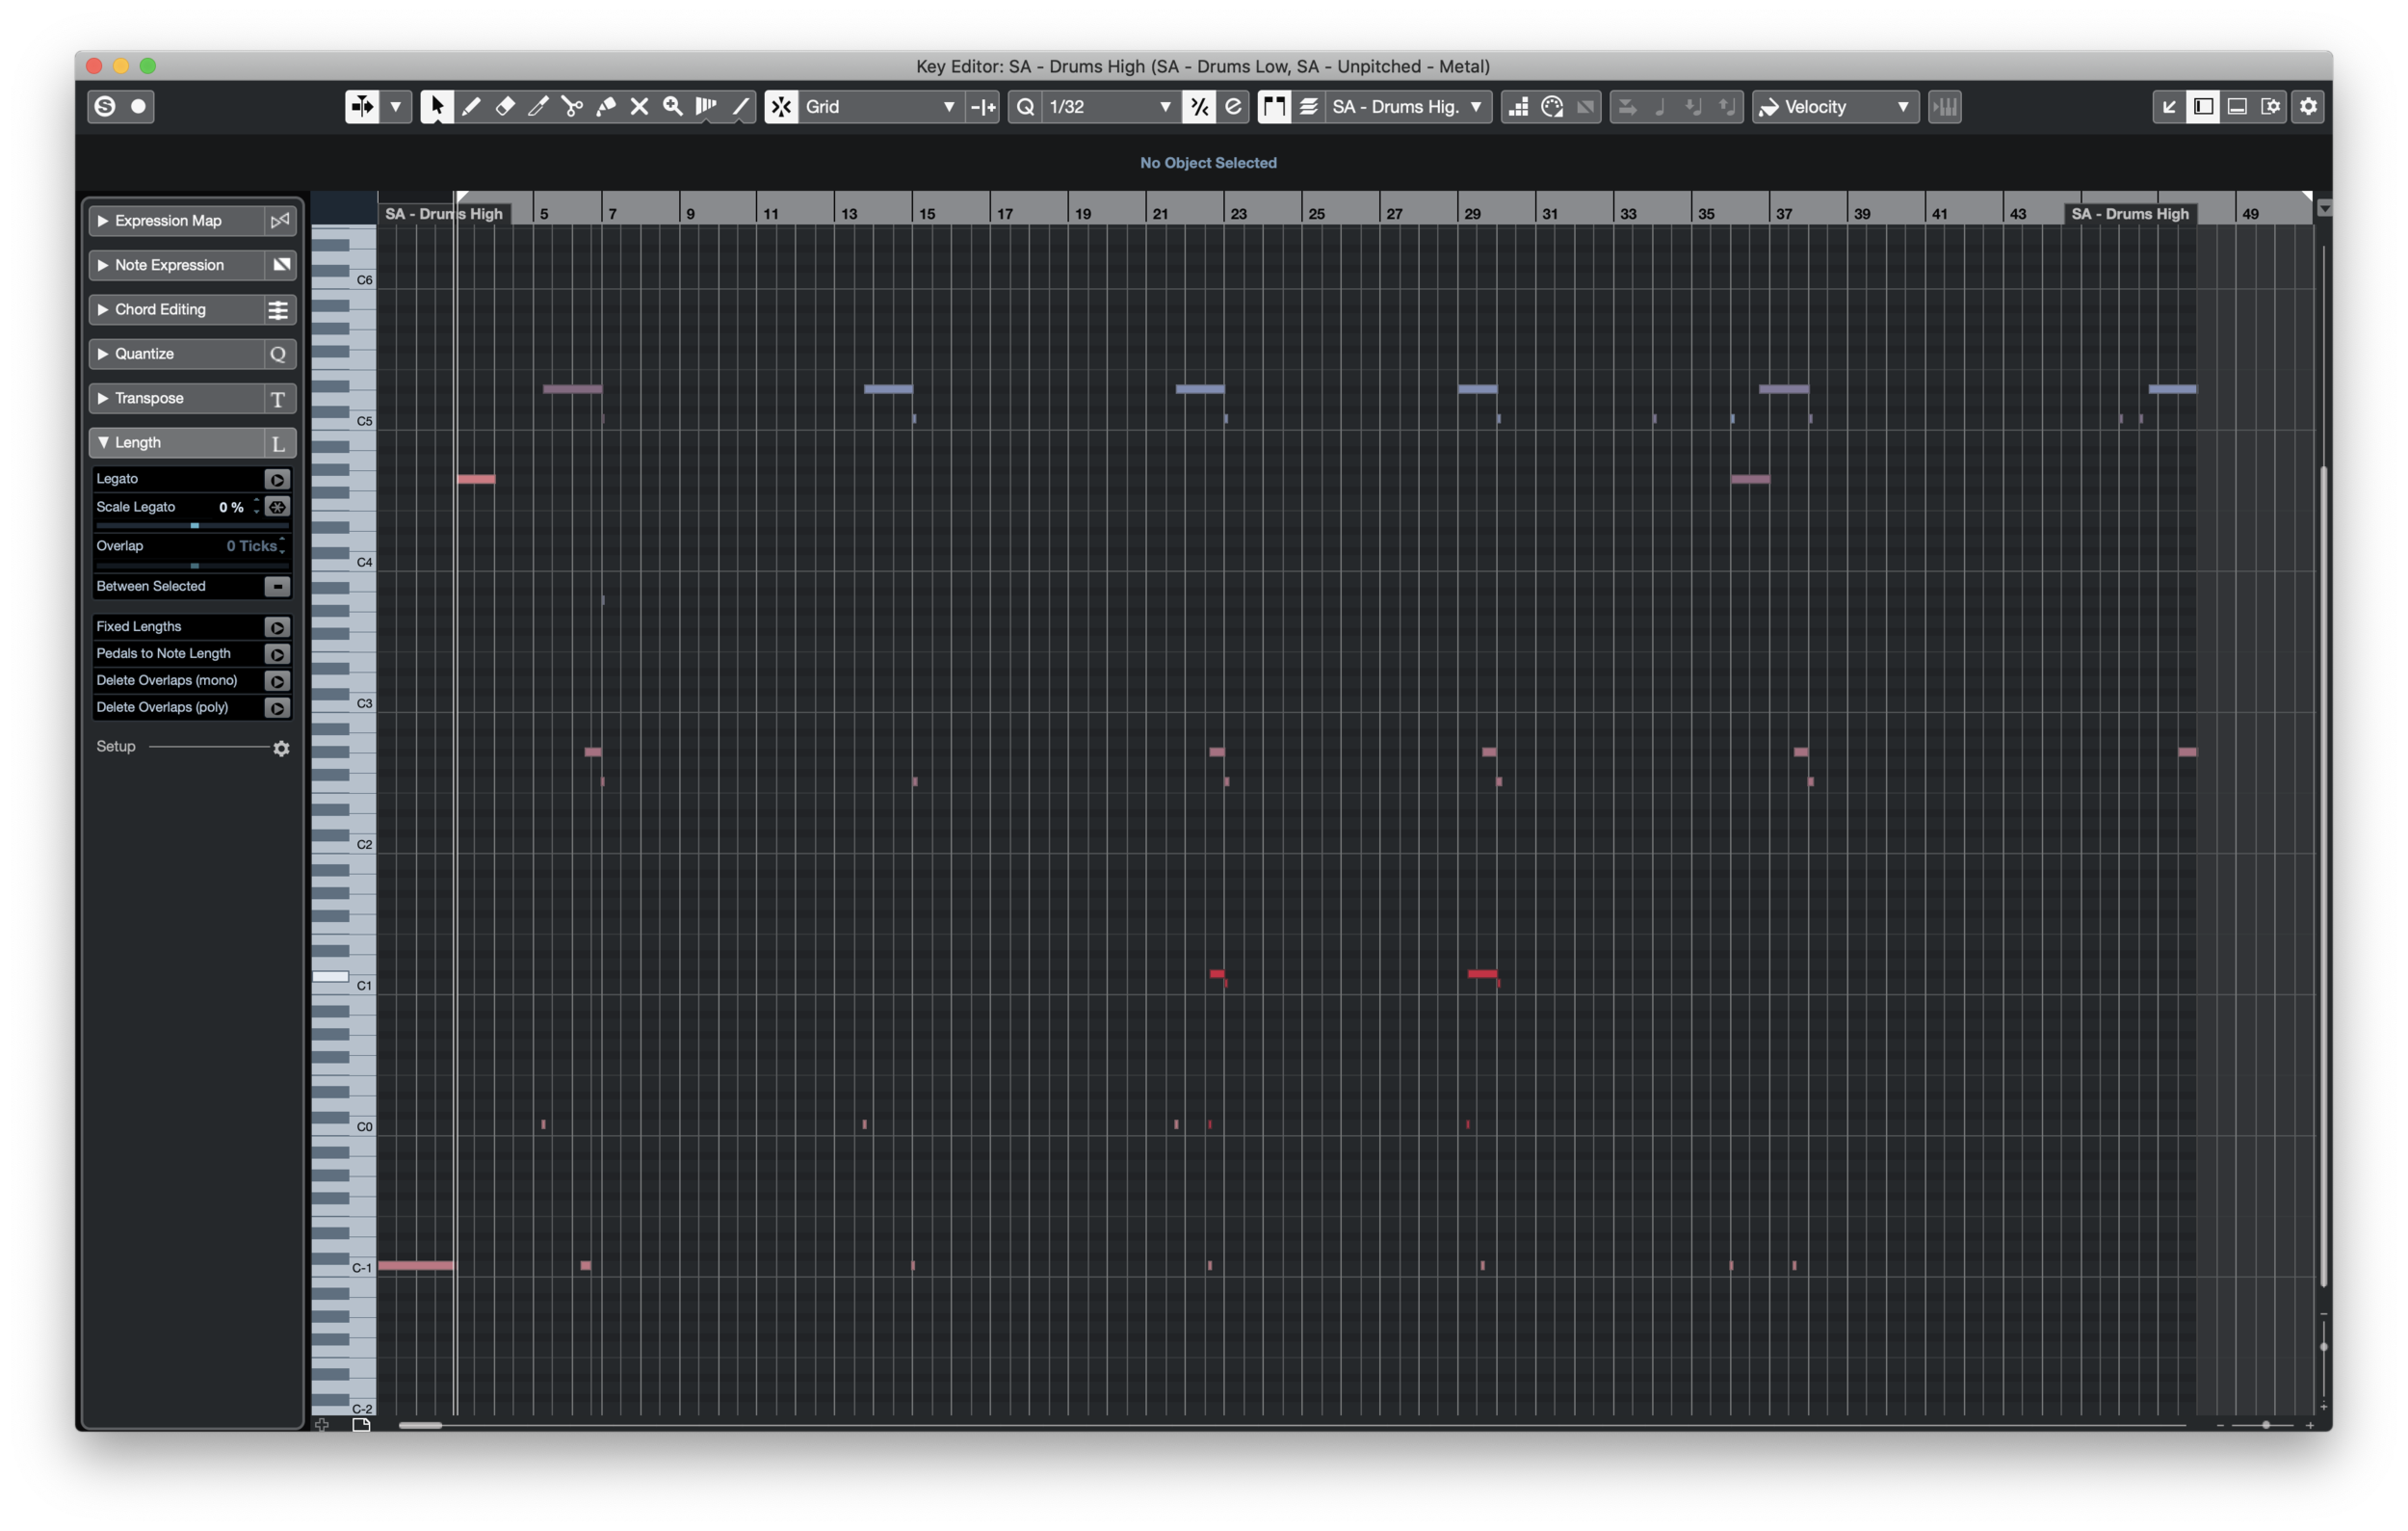
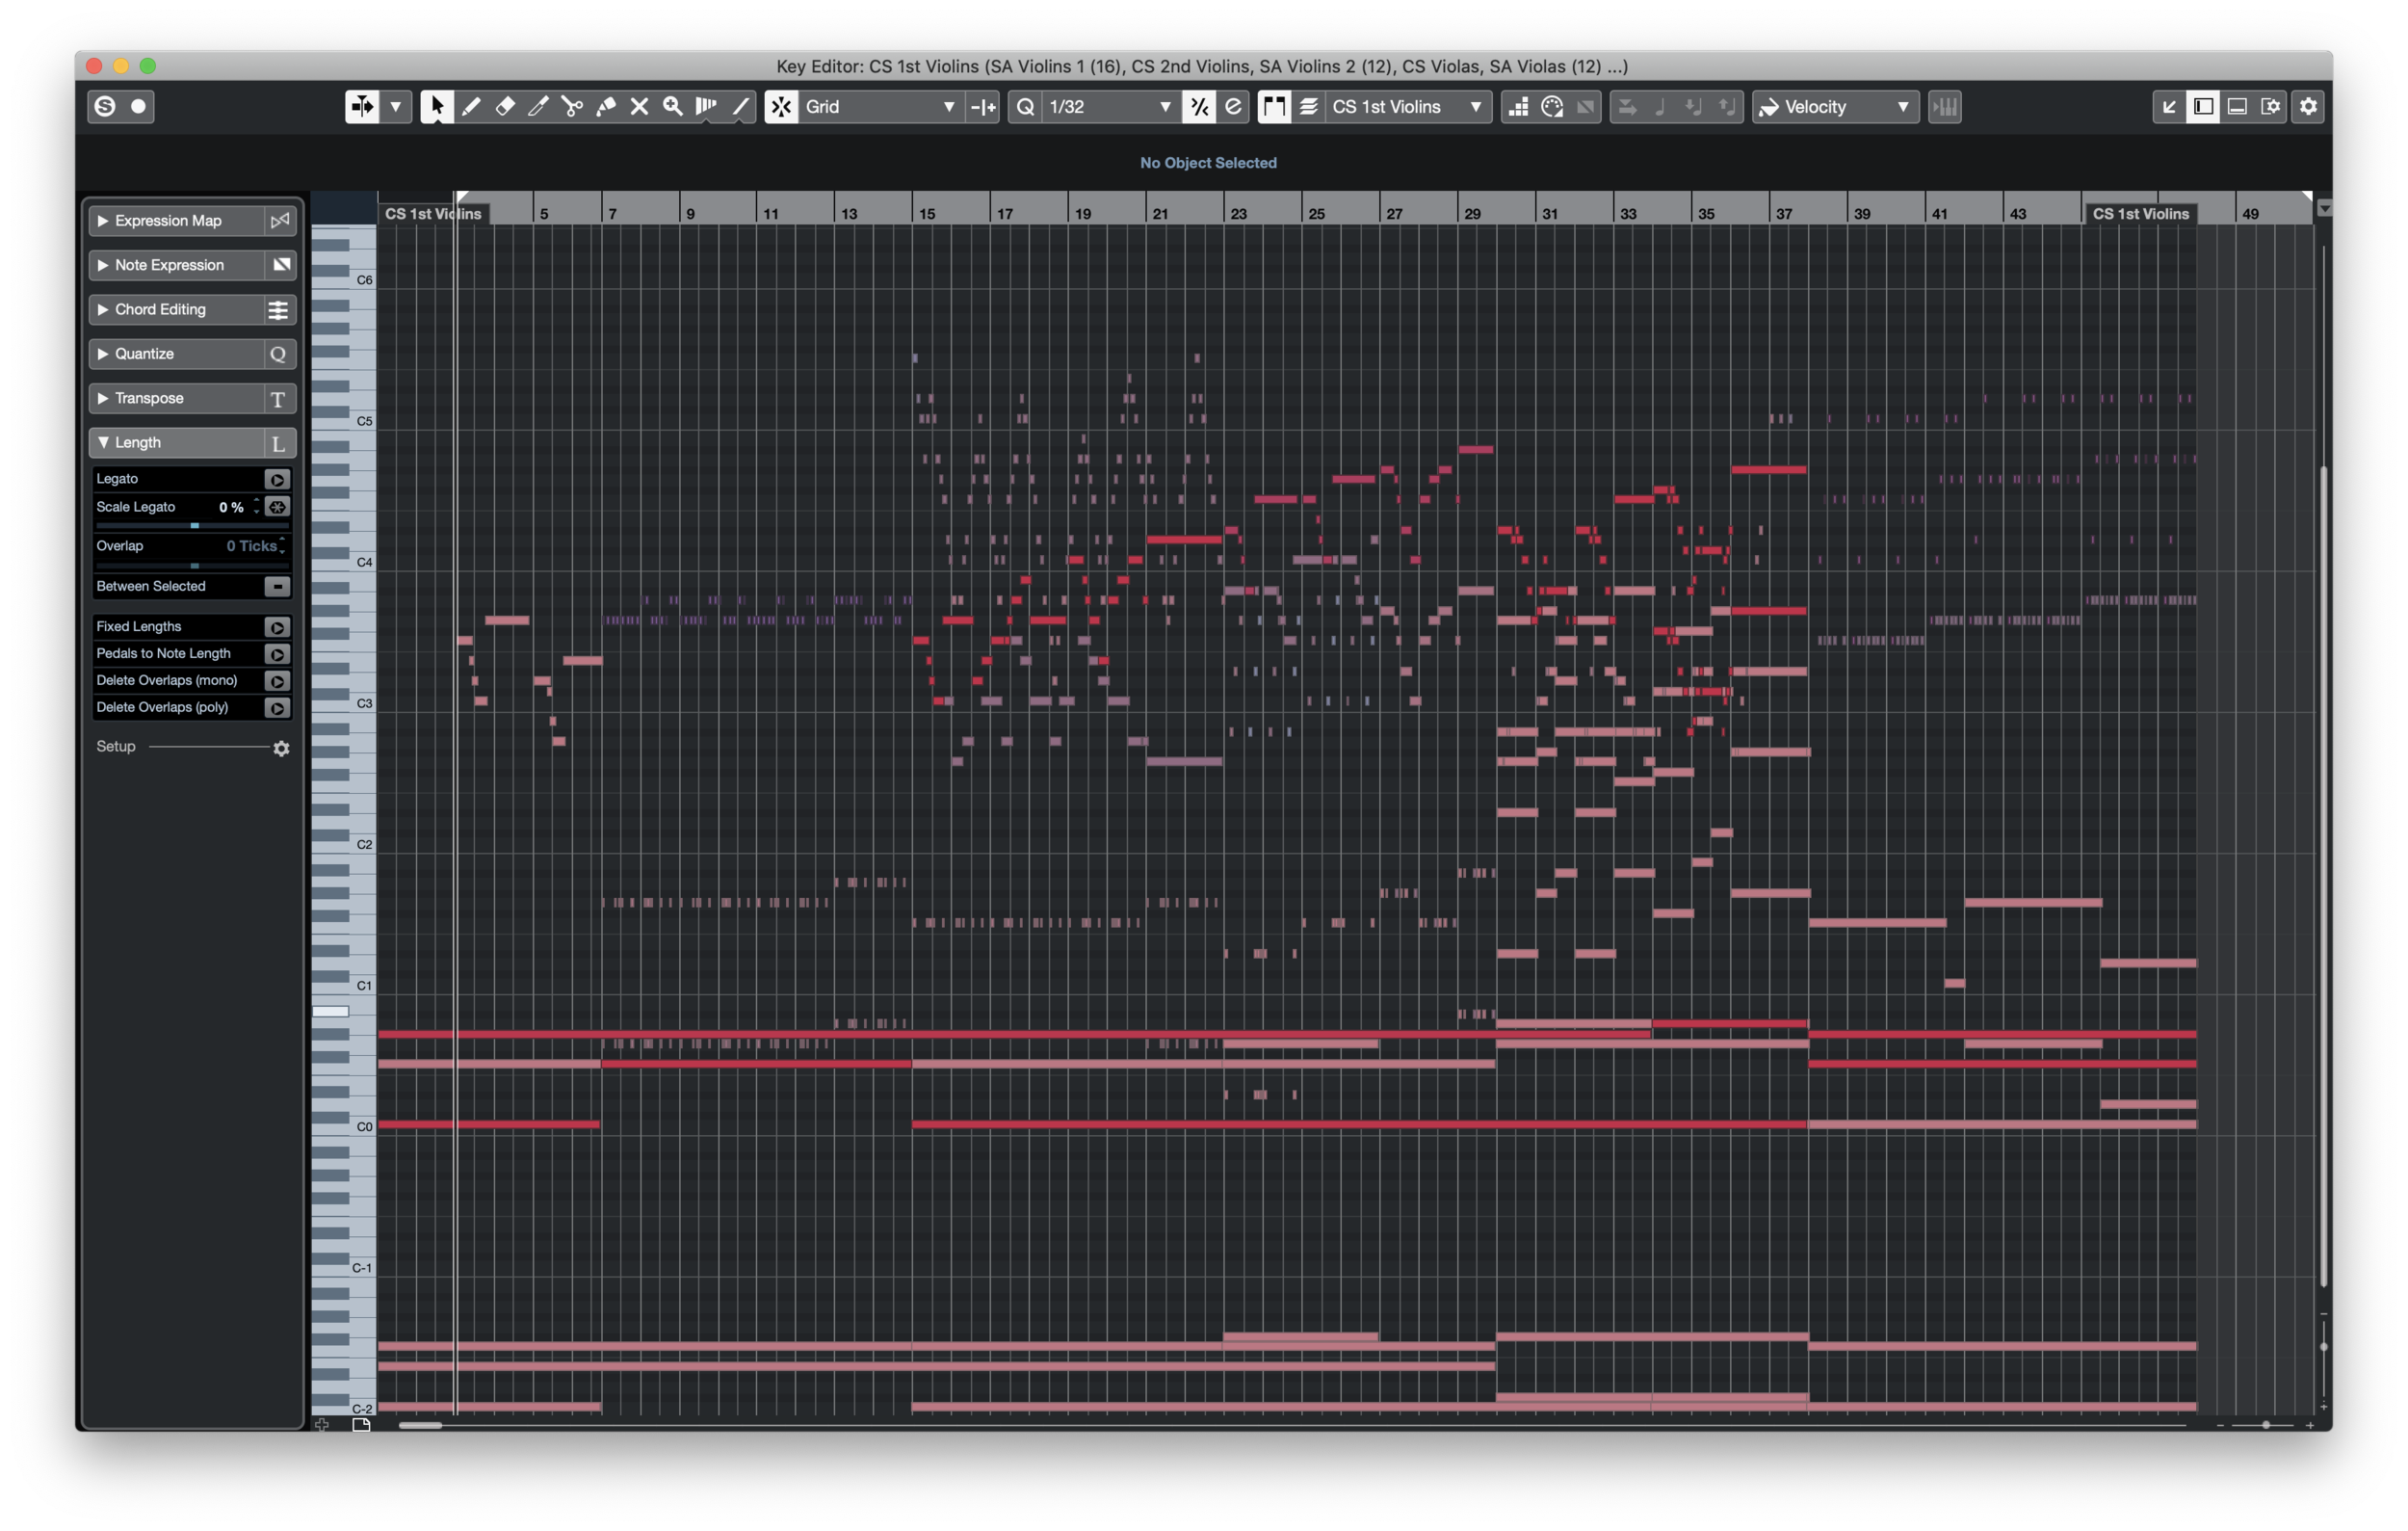
Remember that using EQ to filter different frequency ranges can be a great help. In the transcription example, the low frequencies from the original song were filtered while transcribing the glockenspiel part which was relatively quiet in the mix. EQ helped to isolate the instrument’s high fundamental frequencies to better recognize the notes it played. Then, these notes were recorded in Cubase’s piano roll (shown below) and rechecked for accuracy. Alternatively, they could have also been notated on a musical staff and if this is your preference, go right ahead.
Note: Below, you will find a breakdown of the various instrument sections utilized in the “Pilot For Hire” transcription mockup. Listen to the audio files and analyze the piano roll images while trying to understand what each instrument is playing.

Step 6 - Timbre and Dynamics
I hesitate to include timbre and dynamics in a separate, lower step because it may seem to diminish their importance. Realistically, they should be thoroughly examined during the active listening phase and considered throughout the transcription process.
Timbre, sometimes known as tone color/quality, is the perceived sound quality of a musical note or sound. It, along with the sound envelope, is basically what makes an instrument sound like THAT instrument. Although a trumpet and a cor anglais (English horn) have very similar playing ranges, the differences in the overtones they produce result in distinctively different sound qualities for each. Without delving too deeply into the field of psychoacoustics, the point to be made is that recognizing various instrument timbres will allow you to make better transcription decisions. While you may identify the correct notes and rhythm patterns, unless you assign them all to the correct instruments, you will find that your final transcription is a little ‘off’. It is therefore recommended to spend time, outside of transcribing, to learn the timbral nuances of as many instruments as possible.
Dynamics help to bring a track to life as they not only contain a significant amount of emotional information, but they also help to naturally alter the frequency response of a piece. When transcribing, pay close attention to the initial dynamic levels of instruments as they enter, as well as how they evolve over time. Whether you are manipulating CC data in a DAW or writing dynamic markings such as ƒ or p below a staff, accurately representing dynamic levels will ensure that the piece’s original emotions will be properly translated in your transcription.
Ultimately, nailing the dynamic signature will help to ‘glue’ a transcription together and this fact brings us neatly to the final step…
Step 7 - Putting It All Together
If you’ve diligently followed all of the previous steps, you should have in front of you (at the minimum) a reasonable representation of the original piece.
Congratulations!
If you are happy with your work, take a well-deserved hiatus from listening to that piece before moving on to another. However, you will more than likely find that there is still room for improvement so don’t hesitate to take another pass at transcribing if necessary. Go through the steps again and assess various aspects of your work to see what areas could do well with a bit of refinement. After reanalyzing your work a few times, you should find it in a much better place than before.
Again, congrats!
To close this article, I’d like to share with you the final transcription of “Pilot For Hire” which I hope you enjoy. Feel free to like and share this article if you found it helpful and leave a comment with any questions or suggestions you may have for future content. Also, I would very much appreciate a subscription to my YouTube channel, as well as a follow on my social media accounts linked below.
For your convenience, there is a summary included at the end of this post but I would like to thank everyone who took the time to read through it all. Now, without further ado…
“Pilot For Hire”
SUMMARY
Only transcribe music that matches your current ear training level. As you improve, you may try transcribing more complex pieces.
Actively listen to the music you are trying to transcribe. In a quiet space with a high-quality recording, identify as many details of the musical elements of the piece as possible.
Decide how you want to notate the music. Source manuscript paper if notating by hand. Otherwise, use notation software or a DAW along with an instrument (whether acoustic or MIDI) to play back what you think you are hearing. Utilizing audio equalization can help to isolate notes played by some instruments.
Determine the time signature and tempo characteristics of the music. Be sure to check through the entire piece in case there are any changes to either.
Starting with either the most prominent melodic line or the strongest supporting harmony line, notate each instrument’s part as accurately as possible. Pay special attention to what is happening melodically, rhythmically, and dynamically.
Speaking of dynamics, try to emulate the dynamic structure of the original music as best as you can. This will ensure that your transcription captures the emotional qualities of the original and has a similar balance.
Finally, though it should be considered from early on and throughout the transcription process, timbre (sound quality) plays an important role in creating a precise transcription. Your instrument choices will be heavily based on your perception of sound characteristics and choosing the wrong instrument for a part can make your transcription sound ‘off’, even if everything else is correct.
Re-analyze your work and make corrections until you are fully satisfied with the outcome!

